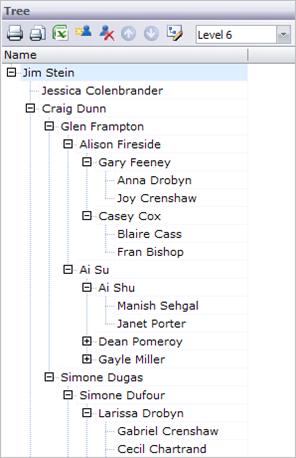
Choose Panels | Tree from the View menu to display the Tree Panel. You can edit records directly in the Tree panel by doubling-clicking on a record. The Level drop-down list allows you to easily expand and collapse the displayed tree.
The Tree panel has the following elements:
|
Element |
Name |
Description |
|
|
Print Tree |
Print the displayed tree. |
|
|
Print Preview |
Preview how the currently displayed tree will look when printed. |
|
|
Send tree to Excel |
Export the current tree to an Excel spreadsheet. |
|
|
Add a Position |
Add a position following the selected position. |
|
|
Delete a Position |
Delete the currently selected position. |
|
|
Move up |
Move the selected record up with respect to its peers. |
|
|
Move down |
Move the selected record down with respect its peers. |
|
|
Modify Tree Settings |
Modify the Tree properties. |
In the default setting the Tree panel displays the name of each member of the organization in a hierarchical tree structure.
To modify tree settings:
1
Click the ![]() button to display the Tree
Settings dialog box.
button to display the Tree
Settings dialog box.
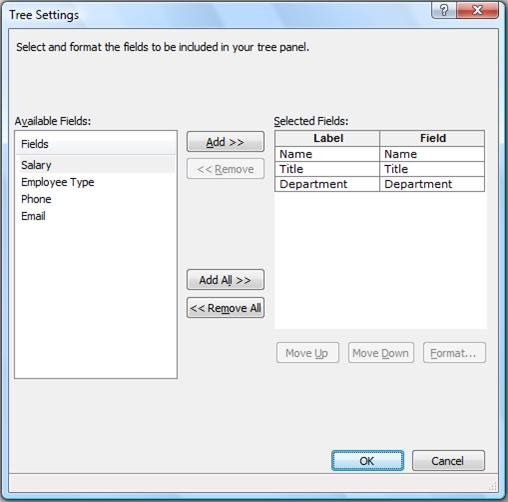
2 Add fields to the tree view by selecting them in Available Fields and clicking the Add button.
3 Remove fields from the tree view by selecting them in the Selected Fields and clicking the Remove button.
4 Use the Move Up and Move Down buttons to adjust the positions of the Selected Fields.
5 Use the Format button to change the formatting of a Label or Field.
6 Click OK when finished.
Note: To change a label name, click on the label (Name, Title, and so on) and update the name as necessary. You can reset the label to the original text by right-clicking on a label and selecting the Use Original Label menu item.
The Tree panel is a great way to move boxes across different branches of your chart. You can drag and drop records within the Tree panel. You can also drag a record from the Tree panel to the current chart. You can even drag a record from the chart to the Tree panel.